(continued from Awards Programs)
Your Restaurant Manager POS System allows you to configure almost every aspect of every screen that comprises the POS Modules. Many of the settings that control the layout of POS screens are covered in earlier sections of this manual. This chapter covers settings that control the look and feel of your system but which are not covered in the following sections of this manual:
Restaurant Manager offers two types of screen savers – bouncing bitmaps and a slide show. A screen savers main purpose is to prevent burning in of images on your screen. This usually happen if a monitor is left in an idle stat for a long period of time. Most computers are designed to into screen saver mode during these down periods. Restaurant Manager allows you to take this down time and turn it into a chance to promote your restaurant.
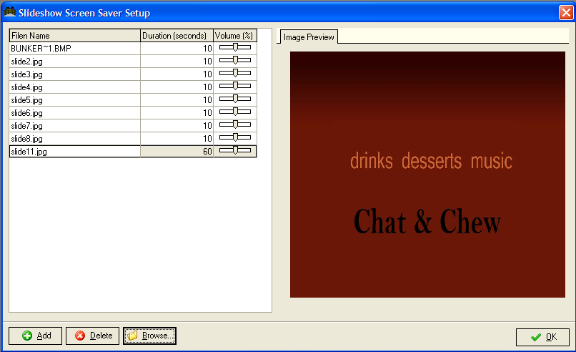
A standard screen saver can be used to promote the name of your restaurant, specials, and events. You can display different screen savers on different station. This option will allow you to re-enforce service messages to wait staff on monitors out of the customer’s sight. The Slide Show screen saver can be used for selling ad space to local vendors.
The Slide Show screen saver differs from a “static’ bitmap as it is capable of displaying more than one picture and is capable incorporating an expanded amount file types. It is the expanded amount of file types is what makes this method ideal for running advertising. The slide show screen saver supports audio/files in the following formats:
|
AVI |
MP3 |
|
MPEG/MPG |
DAT (VCD full movie |
The slide show screen saver supports numerous file formats including the following image file types
|
BMP |
DIB |
GIF |
TGA |
|
JPG |
RLE |
PCX |
|
The POS stations will display the images (and movies) repeatedly when the screen saver is active. When the screen saver is stopped and started again, it will resume from where it left off. This ensures that your advertisers each get equal screen time.
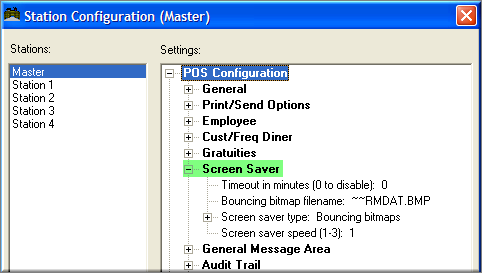
You can configure your system to have a “static” bitmap to display on the POS when in an idle state. We will define a static bitmap as one being constant or unvarying. In other words, there will only be one image floating on the screen when idle. Nonetheless, this image can still be used for a number above purposes as described in the beginning of this section.
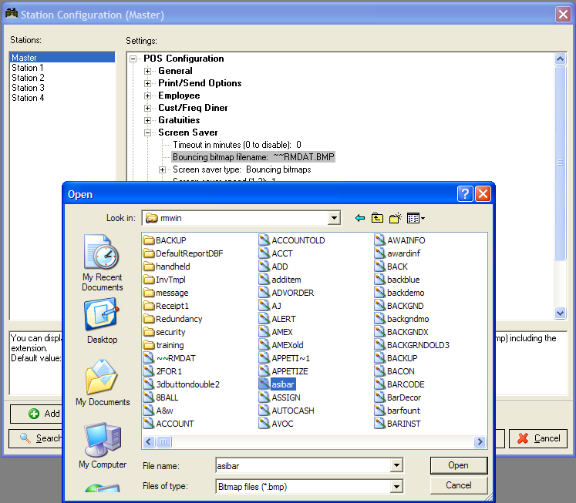
Before activating the bouncing bitmap screen saver, you must copy the image and movie files to the Restaurant Manager working directory (i.e. c:\rmwin).
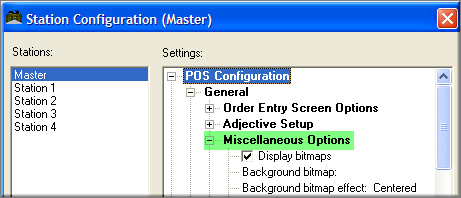
Restaurant Manager allows for a complete customization of background images to match the look or style of your establishment. The Restaurant Manager software is pre-loaded with a blue background. You can change this to whatever color or design you wish and can even program a station specific background. If your system is configured with the Table Service Module you can even customize each table group background to match the look of your dining area. This is in addition to customizing the table layout. However, you can customize the tables by creating your own bitmaps and arrange them on the screen using Image Sets. There remained of this section will describe the steps allowing you to further customize you Restaurant Manager POS system.
The background bitmap file can be set on a per station basis. Bitmaps used for background images should be placed in the rmwin folder (i.e. c:\rmwin). To setup station backgrounds go to Station Configuration and use the [Search Setting] function at the bottom of the form and type “background bitmap”. You can find the following options:
Setup >POS Configuration >General >Miscellaneous Options
The table group background bitmap file can be set on a per group basis. Bitmaps used for table group background images should be placed in the rmwin folder (i.e. c:\rmwin) prior to applying them in the RM BackOffice. Table Group background setup up is found tin RM BackOffice under Set-Up >Screen Layouts >Table Layouts:
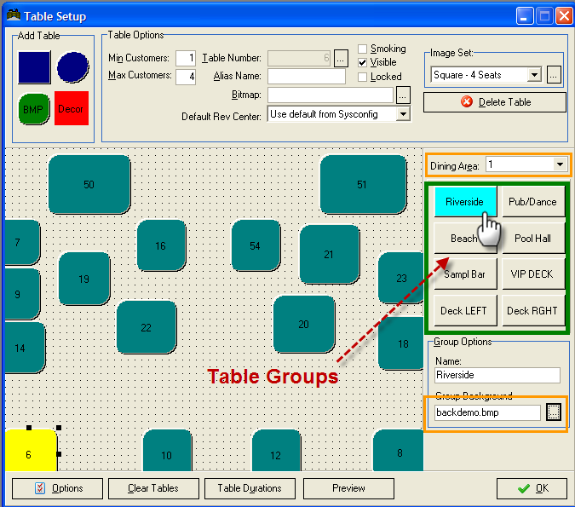
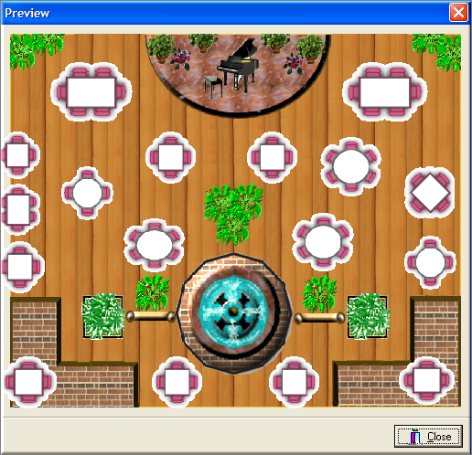
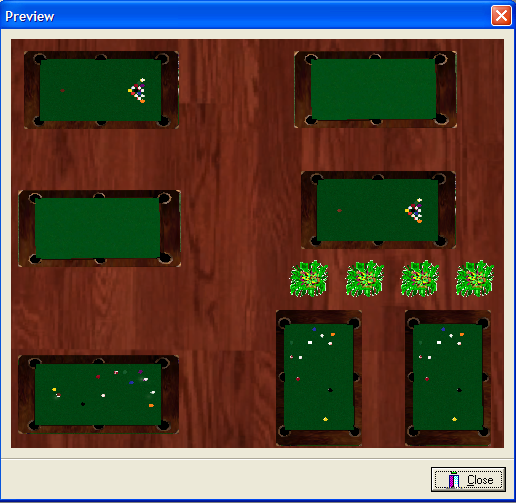
You can verify your changes using the [Preview] button on the bottom of the Table Setup form. See next illustration:
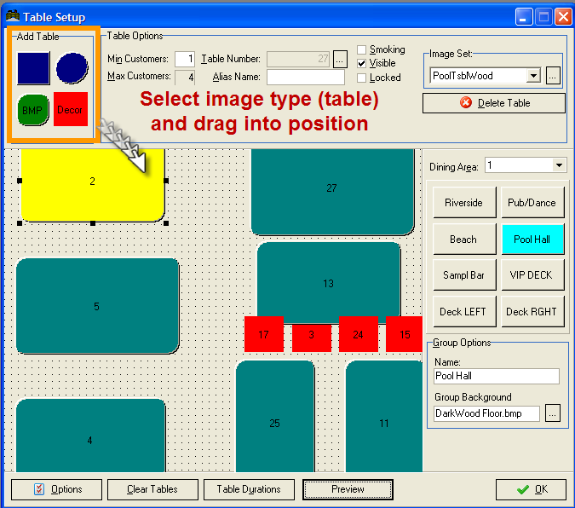
Restaurant Manager comes with a pre-set of images that can be used for tables and décor. You can add or substitute images for further customization. It is suggested that you keep all bitmaps pertaining to Restaurant Manager in the rmwin folder located on the rmserver. The list below is some of the shapes and descriptions for use that are pre-configured and included in your Restaurant Manager software.
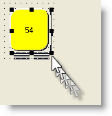
Pre-set image shapes can be resized by click and dragging on the edges.
Adding tables is done in the RM BackOffice under Set-Up >Screen Layouts >Table Layouts. To add a table shape or décor button, you may do the following:
Click on “Preview” to see the buttons would look like on the POS.
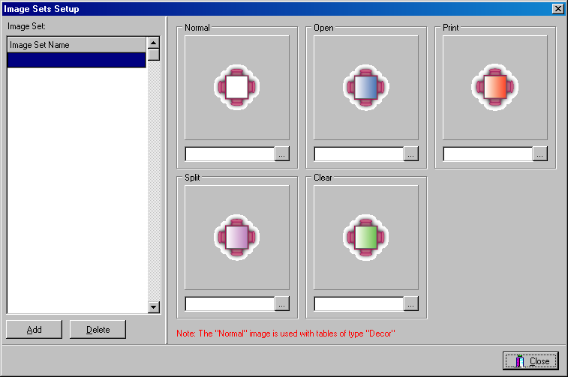
The look of the table bitmap buttons and table bitmap decors are defined using image sets. An image set is a set of selected bitmap images to display the different status of a button.
There are five (5) different images that may need to be specified for an image set. These are:
Image for setting up image sets
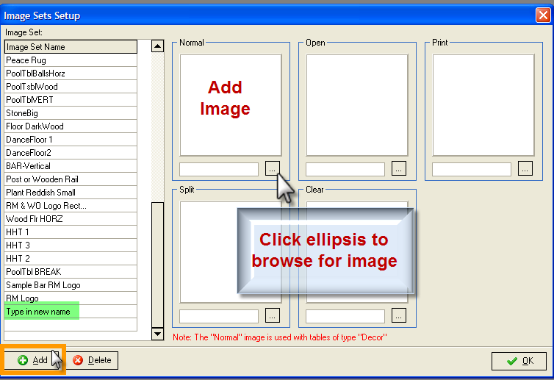
You can customize image sets for to meet you r specific require. Remember that you will have to create fine different image types if you will be using the images for tables. You can access the Image Set Setup form directly in the RM BackOffice by going to Setup > Screen Layouts > Image Sets. To add an image set:
Being a touch-screen based application, the button is the most displayed and interacted object on the POS screen. Your establishment’s environment may dictate the need to change the appearance of the buttons. Changing the grade of a button may make the button easier to read. You may also want to affect the color of text on buttons to also help staff view the buttons with better. Changing a border width may help if your restaurant has an unusual amount of menu items with long descriptions. The two following description will guide you to further enhancing your system.
Options to control the look of the buttons can be set under Setup> Station Configuration under POS Configuration >General >POS Touch Buttons.
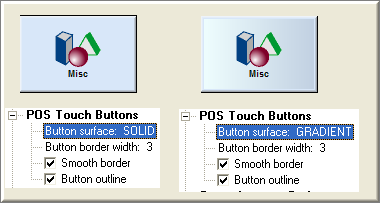
Button Surface –GRADIENT or SOLID. The gradient look can be seen with color of the button becoming darker moving from left to right. Although using gradients may look hi-tech, it should be noted that, on some screen displays specially those at 800x600 or lower screen resolutions, it may not look as great.
Gradient vs. Solid
Note: Gradients are not supported for stations running on Windows ’95
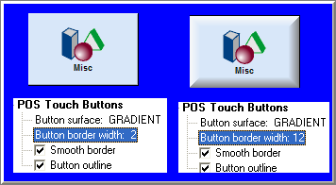
Button Border Width – the width of the border around the buttons is configurable with this option. Use lower values 2 to 4 for lower screen resolutions while a 6 may look good on resolutions of 1024x768 and higher. Valid values are from 2 to 16.
Border Width 2 and 12
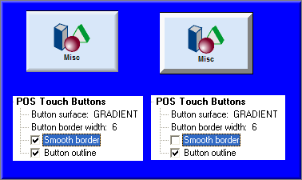
Smooth Border – if enabled, will display the borders in smoothed and rounded look in contrast to “boxy” and “edgy” look.
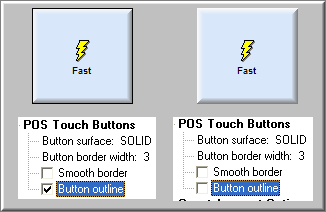
Button Outline – if enabled, will display a black frame around the button
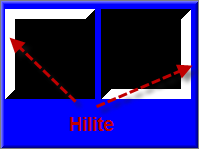
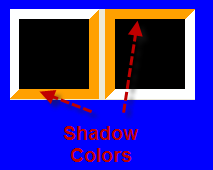
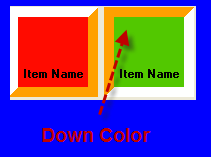
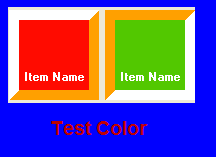
Restaurant Manager allows for the changing the properties of how button colors are display. This is not to be confused with the selecting a color for a button as defined in the POS Function Button Layout. Rather, the function allows you to define the shadow, pane, and text color themselves. The most common use of this function is to change the color of text. For instance, the white text on bright green color might be hard to read for some. Changing the text to black might be the solution. The Edit Color form is found in the RM BackOffice under Setup >General > Button Colors.
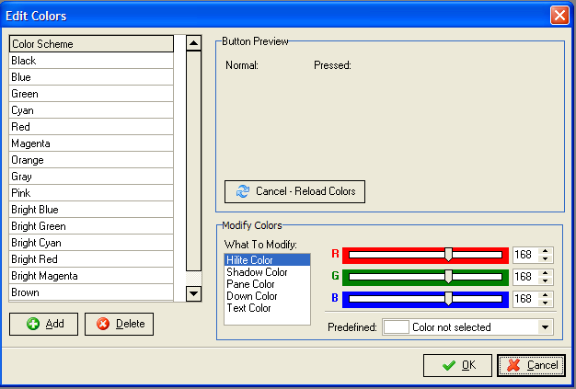
The Edit Color screen is made up of three mains parts: