The following directions assume the RDP server is using Window 7 Pro .
For a Terminal Server, it is best to put your page files on a dedicated hard drive. In addition, because of the multiuser nature of Terminal Server, be sure that your page file is twice the size of your RAM. For example, if your Terminal Server has 4 gigabytes (GB) of RAM, you should have a 4 GB paging file. You should also have two paging files if necessary. For information about how to change the default paging file size, see "Change the size of the virtual memory paging file" in Help and Support Center for Windows.
Use the following steps to turn off Windows Indexing service.
Click Windows "Start" button > "Control Panel" > then click "Programs and Features".
Click "Turn Windows features on or off"
In the Windows Features window verify the Indexing Service is unchecked. Click "OK" to exit.
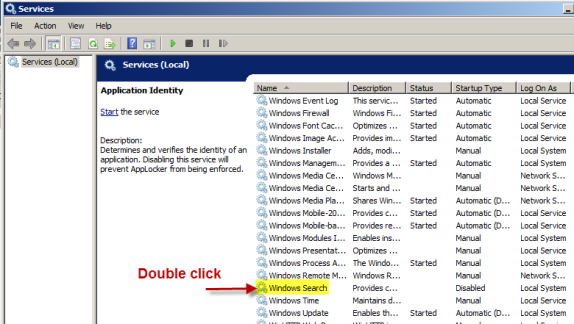
Click Windows "Start" button > "Control Panel" > "Administrative Tools" > "Services". Locate the "Windows Search" service on the list, and double click on it Under the General tab:
Locate "Start up type"
Select "Disabled" from the drop down menu.
Click "Apply" button
Click "Stop" button, Finish by clicking "OK" button.
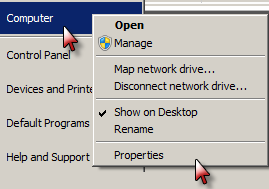
Click Windows "Start" button > "Computer" > right click the drive where the rmwin folder resides (i.e C drive)
Click "Properties".
Un-check the box next to Index this drive for faster searching.
Reboot Computer
After the computer finishes restarting verify the Indexing Service is turned off by:
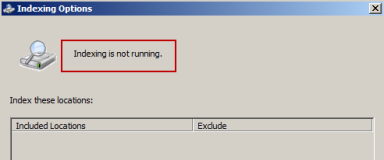
Click Windows "Start" button > Control Panel > Indexing Options.
If the Windows Indexing Service is not longer running you’ll see the message "Indexing is not running" (below).
Click the Windows "Start" button > "Control Panel" > "Administrative Tools" > "Services".
Locate the "Windows Search" service, and verify it says "Disabled".
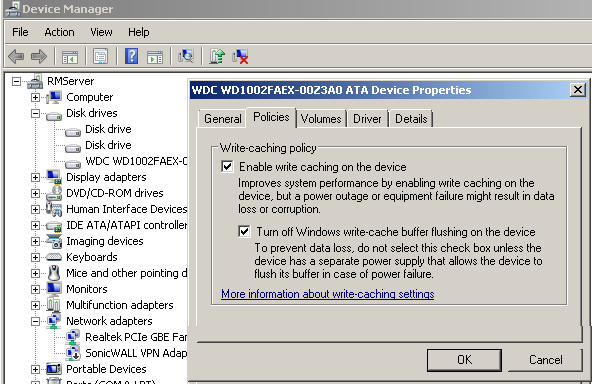
It is recommended that both Write-caching policies be enabled to improve disk performance. Write caching in a connected storage device refers to the use of high-speed volatile memory to collect write commands sent to data storage devices and cache them until the slower storage media (either physical hard disks or low cost flash memory) can accommodate them. Most devices that use write caching require that power be supplied continuously. Improving disk performance is easily accomplished by:
Open the Control Panel (All Items view), and click on the Device Manager icon.
In Device Manager, double click on Disk drives to expand it, and then double click on the listed storage device that you want to enable write caching for. (See screen shot below)
Turn off Windows write-cache buffer on the device- place a check mark in the box for this option to turn off this option. This option is not enabled by default.
Important Note: However, there is one disadvantage in enabling these options – if there is a power outage or a system crash, data might be lost or corrupted. If you have a secondary power supply, like a UPS, you could go ahead with checking these options but there still remains the threat of data loss in the event of a power failure.
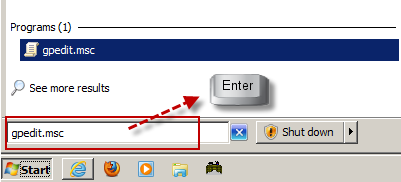
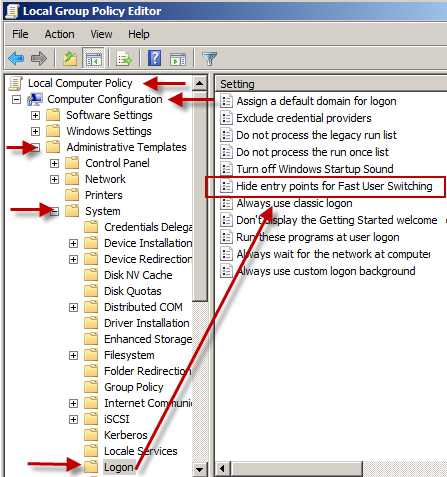
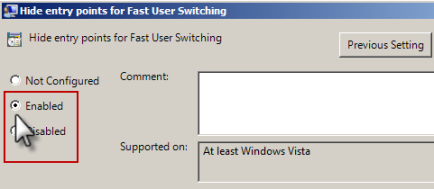
The second step in setting up RDP on the server computer is to enable the "Hide entry points for fast user switching" option in the Local Group Policy Editor.
Click "OK". Exit Local Group Policy Editor.
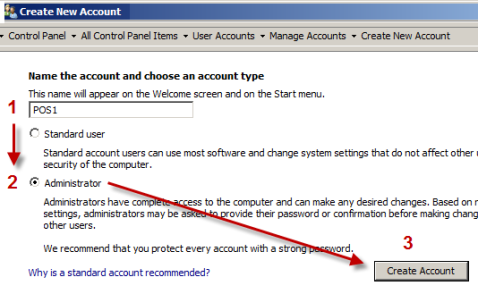
Create a unique Windows User Account for each POS station you will be running on the tablet device:
Click Windows "Start" button, Click "Control Panel", and then "User Accounts".
Click "Manage another Account"
Click "Create a new account" in the Manage Accounts window.
Click "Administrator"
Click "Create Account"
Assign the user account a password
Click on the account name (i.e. POS1) in the Manage Accounts window
Click "Create a Password"
Type password in the New Password field" and confirm the password.
Click "Create Password" button
Repeat steps 1 thru 4 for each tablet running RMPOS
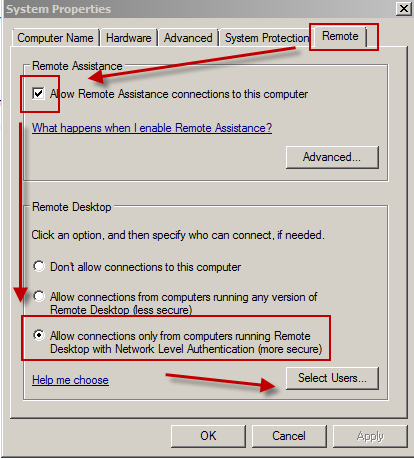
Use the following step to enable Remote Desktop.
Right click on Computer, click "Properties",
Enable "Allow connections only from computers running any version of Remote Desktop with Network Level Authentication".
Click "Add" and then "Advanced"
Click "Find Now" button in Select User window.
Click the POS account (i.e. POS1) on the "Search results" list. Click "OK" button.
Click "OK" in the Select User window.
When finished, click the "OK" button in the Remote Desktop User screen and again in the System Properties screen.
Exit Control Panel.

Repeat steps 4a thru 4d for each POS user account.
By default, the RDP Terminal server listens on TCP port 3389. This port must be changed to comply with PCI PA-DSS Standards (PA-DDS 3.1c). In addition, using default port 3389 leaves the system vulnerable to a man-in-the-middle , pass the hash, and severe virus attacks. Changing the port is mandatory whether you are processing credit cards on the tablet device or not.
You can change default port on the server using the following steps:
Note: Changing the system registry can lead to serious problems if done incorrectly. It is recommended that you back up the registry using the steps outlined in the Microsoft Support article " How to back up and restore the registry in Windows"
Start Registry Editor(Regedit).
Locate and then click the following registry subkey:
HKEY_LOCAL_MACHINE > System > CurrentControlSet > Control > TerminalServer > WinStations > RDP-Tcp> PortNumber
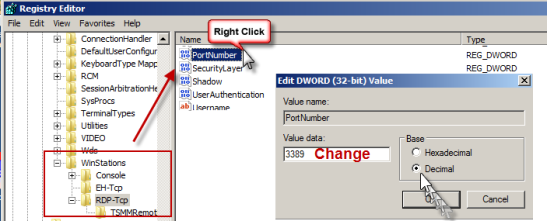
On the Edit menu, click Modify, and then click Decimal.
Type the new port number, and then click OK.
Quit Registry Editor.
Restart the computer.
Make note of the new port number. You will need the port number when configuring RDP on the tablet device.
Note: this step may require configuring the firewall and/or router to allow the new port number.
Because Windows Firewall restricts communication between your computer and the Internet, you might need to change settings for Remote Desktop Connection so that it can work properly.
The first step to configuring Window's Firewall is to allow the program:
Open Windows Firewall by clicking the Start button Picture of the Start button, and then clicking Control Panel. Locate and click Windows Firewall icon.
In the left pane, click Allow a program or feature through Windows Firewall.
Click Change settings. Administrator permission required If you're prompted for an administrator password or confirmation, type the password or provide confirmation.
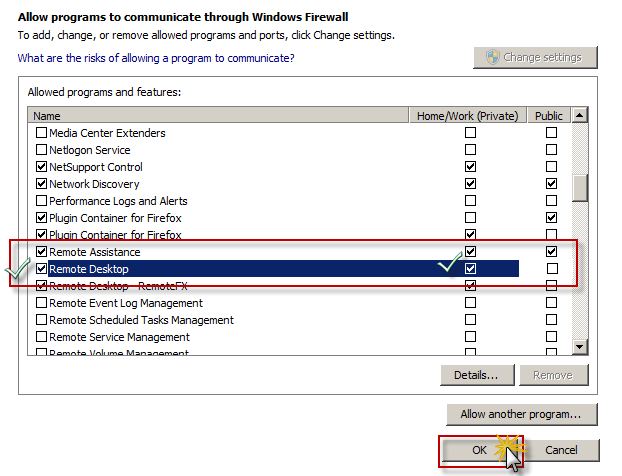
Under Allowed programs and features, select the check box next to Remote Desktop, and then use the check boxes in the columns to select the network location types you want to allow communication on.
Click "OK"
 .
.
Note: If the "Change" settings button is unavailable, you might not have permissions to change some settings that are managed by your system administrator.
By default, the RDP Terminal server listens on TCP port 3389. This port must be changed to comply with PCI PA-DSS Standards (PA-DDS 3.1c). If you have not done so already, use the instructions under the section Change Terminal Services Default Port to change the default port number.
Open Windows Firewall by clicking the Start button Picture of the Start button, and then clicking Control Panel. Locate and click Windows Firewall icon.
In the left pane, click Advanced settings.
Click "Inbound Rules" on left pane
Click "New Rules" on the pane to the right
Click the Port radio button, Click "Next"
Type the new port number in the Specified local port box, click "Next"
Verify the "Allow the Connection" radio button is checked, click "Next"
Enable the network were the port is allowed (i.e. Private, Public, etc), click "Next"
Type a name for the connection rule (i.e. RMRDP), click "Finish"
Exit Windows Firewall
You should configure your system to allow only the POS related computers on the network using MAC address filtering. However, MAC filtering isn't foolproof but adding this level of protection makes it a little more difficult for hackers.
Make sure WPA2 is being used on the router and the default SSID has been changed and is not being broadcast.
If present on your system, include the following folders into your antivirus exception list
Paging file location(s)
C:\Program Files\UPHClean
C:\Windows\System32\Spool
Add the Uphclean.exe process into exception list
Note: The User Profile Hive Cleanup service helps to ensure user sessions are completely terminated when a user logs off. this service may or may not be installed ion your system.
Configure regular scheduled defragmentation of paging files(s). IObit has a very good free defrag program that continuously defrags when the computer is idle
You must place a shortcut to RMPOS in the Windows Startup folder to effect the POS every time you login to user account:
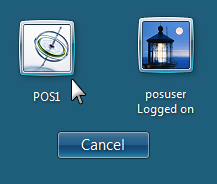
Switch users by logging off the default desktop and re-login to the server desktop as POS1.
Add a shortcut for ‘RMPOS.Exe 1’ into the Startup folder.
Repeat switching users for each POS account, remembering to add the station number parameter at the end of the program name: (RMPOS.Exe 2, RMPOS.Exe 3, etc..)
Reboot the server computer
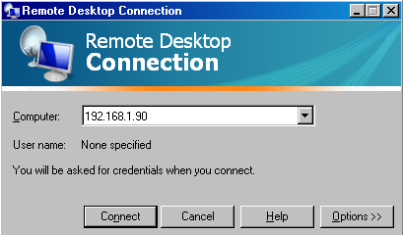
To ensure RDP is working first, it is best to test on a wired network first if possible, then use the tablet.
PING the server IP address.
POS1 should appear and the RMPOS should start.