Last Topic "Provision SQL Database"
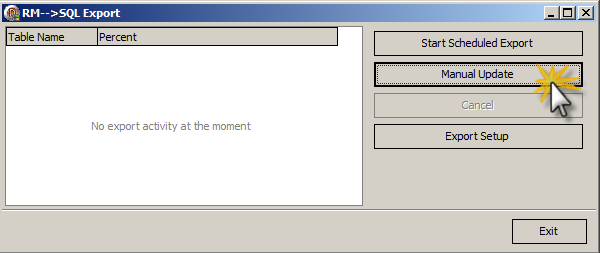
In this section of the documentation we provide the necessary steps to send data from Restaurant Manager to the MS SQL Server. We accomplish the data transfer using RM SQL Data Export Utility (RMSQLExport.exe). The utility can be access using the one of the methods outlined below:
Select Window's "Start" button > Programs > Restaurant Manager SQL v18 folder > RM SQL Data Export Utility
Go to rmwin directory and select RMSQLExport.exe
Windows Start > Run > enter C:\rmwin\RMSQLExport.exe
Note: "C:" in the commands above represents the drive where the rmwin folder resides. This may be different on your computer.
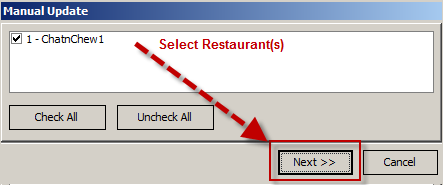
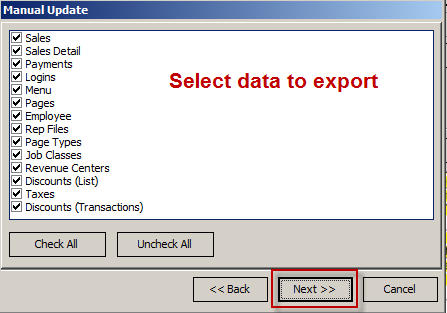
The exporting process will allow you to select data from one or more restaurants. A single store will export data from the local rmwin folder. If exporting data for multiple stores, you will link to the same folder used when setting up Central Manager. Use the following steps below to export Restaurant Manager data to MS SQL Server:
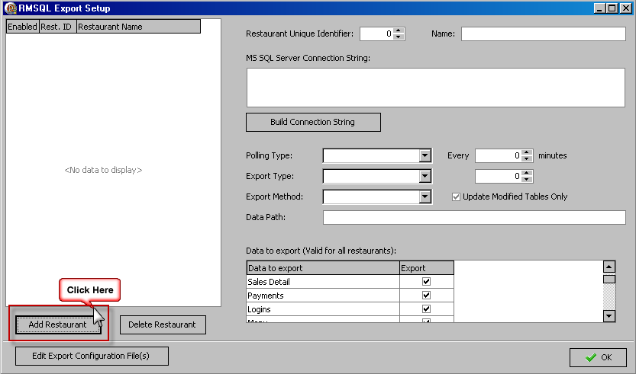
Click on the "Export Setup" button to set up the location (s) you want to export data from (i.e. ChatnChew Store 1, ChatnChew Store 2,etc).
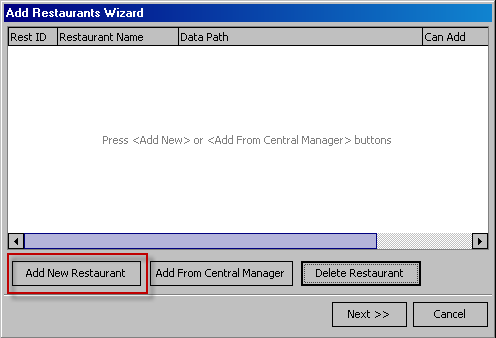
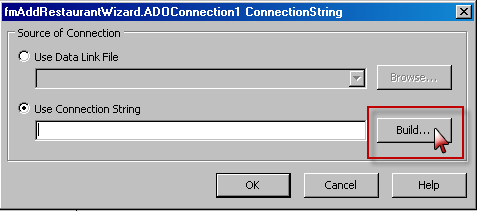
Since this is the first time the data export has been run, you will see a screen similar to the one below. Click the "Add New Restaurant" to start the Add Restaurant Wizard.
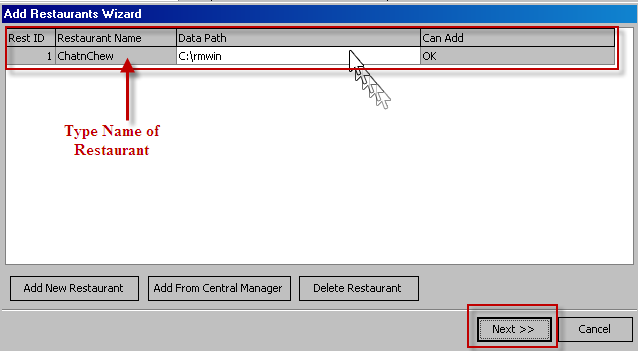
Restaurant Name- Click on the Restaurant Name cell and type the name of the restaurant.
Data Path- click on the Data Path cell and enter the directory path where the rmwin folder resides (i.e. c:\rmwin). Alternatively, use click on the ellipsis button in the cell to enter the directory path. If using Central Manager, you need to drill down to the location folder:
- Store 1- C:\rmwin\LOC0001\
- Store 2- C:\rmwin\LOC0002\
Can Add- by default this will read "Please specify a path". This field will automatically change to "OK" when a directory path has been entered in the neighboring cell.
Click the "Next" button after adding all restaurants.
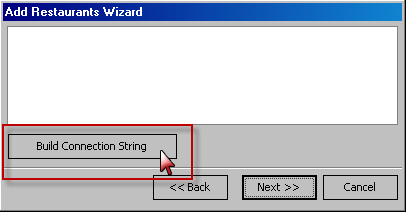
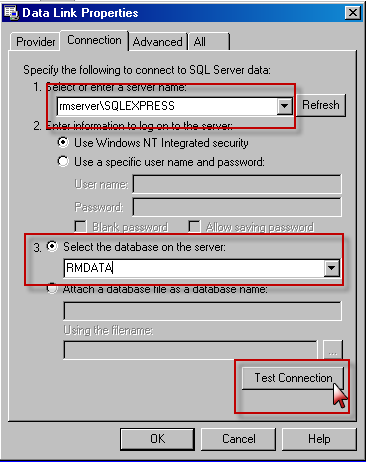
1. Select or enter server name- type the name of the computer followed by " \SQLEXPRESS" . In the picture below our server name is rmserver so we entered "rmserver\SQLEXPRESS". Alternatively, you may you the drop down menu to make your selection.
2. Enter information to log on to the server- select the "Use Windows NT Integrated security" option.
3. Select the database on the server- type "RMDATA" or use the drop down menu to make your selection.
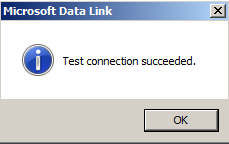
Click the "Test Connection" button when finished configured the data fields above.
You should get a confirmation that the connection is successful – if not check the connection settings and try again.
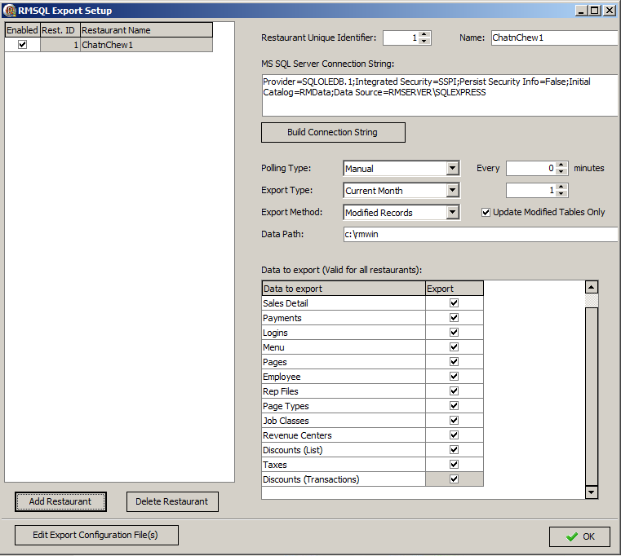
The setting in this form are discussed in the section: Scheduling Data Updates.
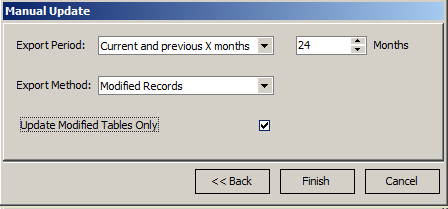
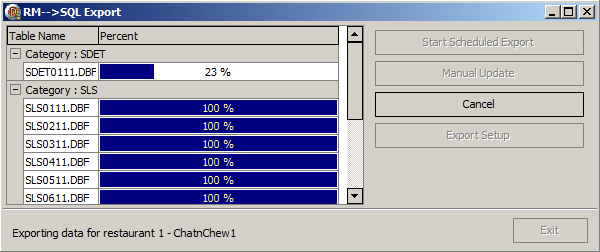
You’ll see the export progress. The export might take a while to complete depending on how much data Restaurant Manager contains for the time period selected.
Note: use the default settings the first time you run this program. If running a second time change the Export Method to "Brute Force" and uncheck "Update Modified Tables only".
The first two steps in the initial setup process covered setting up communications between SQL Server and Restaurant Manager in addition to making the RM database available for reporting services. The last step in the initial setup process will be to deploy a number of preset reports to the MS SQL Service reporting services for viewing.
Next Topic "Deploying Reports"