This document will not cover the installation steps of Restaurant Manager version 18 or Microsoft Office. Please refer the each software installation guide for specific instructions. This document will only cover the installation of the software necessary to run the RMSQL Reporting user interface.
Some Window's programs may already be installed (i.e. IIS) but efforts should be taken to make sure they have been installed properly. The installation of all software should be performed on the computer within the network where the Restaurant Manager software resides. This is true for both single store operations or sites using Central Manager. If not installed on the rmserver, who will need to follow proper networking procedures to insured uninterrupted access. The steps in installation setup should be followed in the order outlined below:
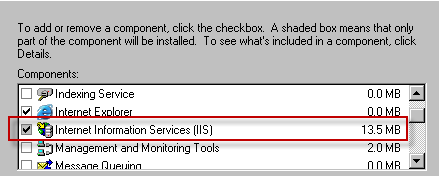
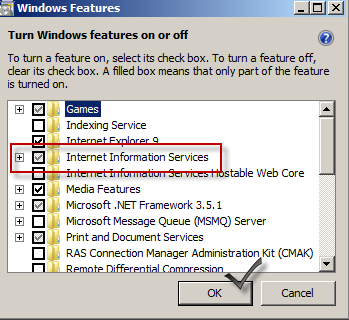
IIS is a Window's program that is typically included in the operating systems software. You will need the original installation disc (i386) to install IIS if it has not already been installed. IIS should be installed and enabled prior to installing the SQL server software. Skip to the topic on installing the SQL Server software if IIS has already been installed and enabled. You can verify the IIS installation using one of several methods:
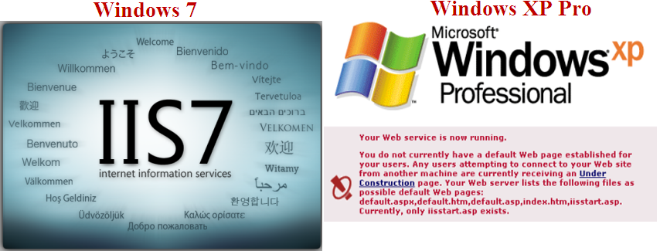
Verify proper installation by running opening up an internet browser (i.e. Internet Explorer) and enter the following command in the URL address: http://localhost. If successful, you should see IIS’s default help screen (shown below).
Use the following steps to install IIS for XP.