(continued from Graphics and Layouts)
The Restaurant Manager BackOffice Module offers many management functions that help you run your business, analyze your sales and maintain your POS System in top working order. As described in the chapter on Configuring a New System, the BackOffice Module is used to setup and control the operation of the POS Module(s) and workstations. Once a system is fully configured and operational, the BackOffice Module is also used to execute Management Functions and to print Reports.
Users typically access the BackOffice Module from the computer that serves as the Manager Workstation. In systems where the BackOffice Module has been defined as an External Program, the BackOffice Module may also be run on POS Workstations.
Every time the BackOffice Module is launched, users will be prompted to login using their Employee Password. The drop down menus and icons displayed at the top of the BackOffice Screen help users navigate the many available setup forms and BackOffice functions available.
Or use standard Windows procedures to access the Restaurant Manager directory (usually C:/rmwin) and then launch RMWIN.exe.
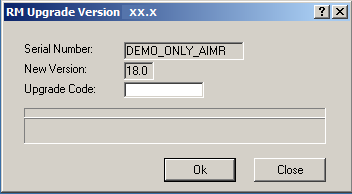
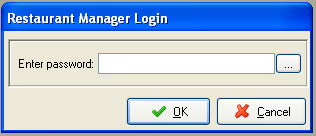
Access to the BackOffice Module is controlled by an Employee Password prompt that cannot be disabled. The prompt is referred to as the “Restaurant Manager Login” and appears automatically every time the BackOffice Module is opened:
The Security Level and Administrator status associated with the employee who logs in controls the Setup Forms and other BackOffice operations the user will be able to access.
The Master Password and the rarely used Daily Password may also be input at the Restaurant Manager Login prompt. When the Master Password is used, however, the operator will not able to access any operations protected by an Administrator Password prompt. When the Daily Password is used, the operator gains temporary access to the Employee Admin Password form which allows re-definition of Administrator Password that may have expired.
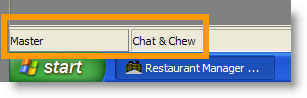
The type of password used to access the BackOffice Module is always displayed above the [Start] button at the base of the screen. The partial screen shot below is an example of what you would see at the lower left of the screen if someone used the master password to access a system licensed to a restaurant called Chat & Chew:
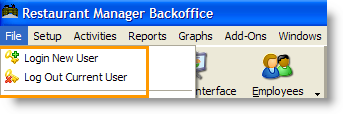
The Restaurant Manager Login prompt can be manually recalled using the Login New User option under the File menu on the Menu bar if a different user wishes to take over operations of the BackOffice Module.
The Restaurant Manager BackOffice module is where most all programming is done. Menu programming, station setup, labor programming, guest checks, payments are examples of functions configured in RM BackOffice. The RM BackOffice is defined by menu headings on the menu bar containing sub headings. The headings and sub heading contain Setup forms and functions used to program and manipulate BackOffice and POS functions and data. In addition, you will find customizable quick buttons on the toolbar for easy access to various setup forms.
The various system configuration and management options that comprise the BackOffice Module are accessed via drop down menus that appear across the top of the main screen of the BackOffice Module
You will find nine menu headings on the top of the RM BackOffice menu bar. Each heading contains a drop down menu that is activated when clicking on it. Below is a list of the headings:
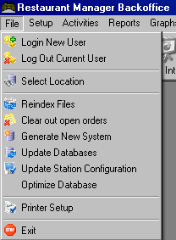
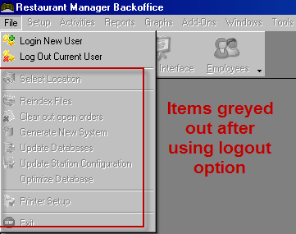
File- this heading is the home for several functions used for general login/out purposes and major database manipulation. Detailed information is covered in the File topic.
Setup- this heading contains most of the setup form that are used to configure you system. Setup forms for menu, labor, and station configuration are found in the area.
Activities- this heading contains applications used more for daily purposes. Session information, bulletin board editing, e-mail functions, and edit login data are a sample of function found here.
Reports- this heading contains only two functions: a link to RM Reports and Server Reports.
Graphs- this heading contains the Sales Graphs setup form.
Add-Ons - this heading contains the setup forms for separate modules Guest Accounts, Frequent Diner program and Customer databases.
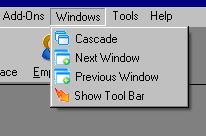
Windows- rearranges the windows currently displayed on screen, use the standard Windows options listed on this drop down menu
Tools- Allows access to a text viewer and Restaurant Manager On-line program.
Help- Contains general information like Users manual, License Agreement, etc.
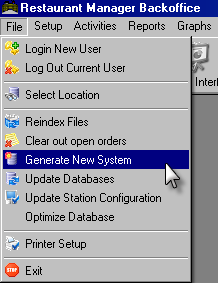
This section only covers the setup forms accessed under the File drop down menu of RM BackOffice module:
This operation is also useful if you use your system for training when it is first installed. Use this function when the initial training period is completed and you would simply delete the sales rung up for training purposes.
NOTE: If you put the system in Training Mode for training sessions, there is no need to generate a new system before the “go live”.
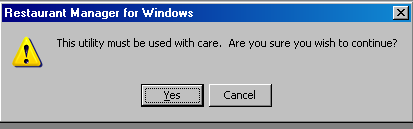
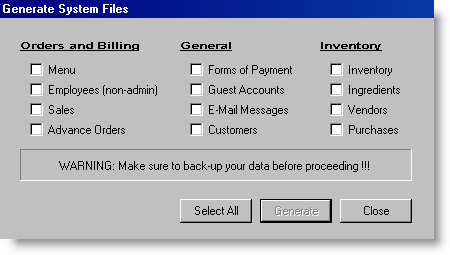
Before generating a new system you should always back up your data to make sure you don’t accidentally delete data you may need later. For instance, when you generate a new system, employee login data will be lost. If you have been using Restaurant Manager for time keeping, you will want to have data backup. The procedures for generating a new system include multiple prompts reminding you that to back up your data because the procedure cannot be undone. This function can also be access in the RMWIN folder using SYSGEN.exe.
NOTE: If you wish to delete data in a more selective way, see the section on Adjusting Sales Reports or the various sections on deleting transactions, employees, menu items, etc.
To rearrange the windows currently displayed on screen, use the Standard Windows options listed on this drop down menu.
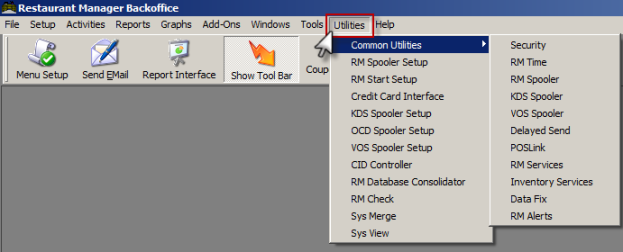
The options under this menu heading links the end user to various setup forms and executable files. Options under the Common utilities sub menu contain common executable files (.exe) needed when using certain programs. Most of these executables may already be programmed to run automatically during a computer starting process. The setup forms listed under the Utilities menu are used to control the behavior of the executable programs. Example, the RM Spooler Setup Form is used to configure prep area and guest check printers: RM Spooler is the service needed to process data sent to printers. Most of the items under this menu heading should only be used by authorized Restaurant Manager resellers. Extreme caution should be taken before altering data via the setup menus. It is highly recommended the setup forms and unused executables be password protected insure a smooth running POS system. Note : some of the items listed under this menu heading may require the purchase of an additional module and hardware.
 R
R
Below is a list of the programs found under the Common Utilities sub menu and a brief description of their functionality.
Below is a list of the programs found under the Utilities menu and a brief description of their functionality.
The following is a list of options contained under the Help menu:
By default the BackOffice Module is configured with a single toolbar known as the “Custom” toolbar. As the name indicates, you may customize this toolbar by adding icons that link to frequently used Setup Forms and Dialogue Boxes. The Custom Toolbar may also be removed from the screen using the “Show Toolbar” option on the Windows drop down menu:
Below is a screen shot of the tool bar. By clicking on the arrow to the right of the button command on the toolbar, you will produce a drop down menu “Add or remove Buttons”. In the “Add or remove buttons” settings, you can remove any current button commands immediately. To add functions you must go to “Customize”. You can also reach the “Customize” settings by right clicking anywhere on the toolbar.
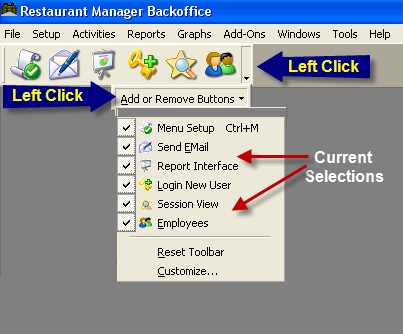
You can remove any available option by moving the cursor over your selection and left click on it. The check mark in the box next to your selection will be removed along with the icon/text in the toolbar. The button command in the display list will still be present. Any selection will remain located in the “Add or Remove” display until the toolbar has been reset using the “Reset Toolbar” option.
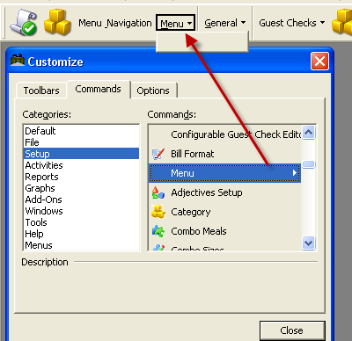
Using the steps described above to enter the Toolbar Menu, click on the “Customize” option on the bottom of the toolbar option display and the click on the “Command” tab. The Command tab has two columns: Categories and Commands. Please note the “Default” category has no commands listed.
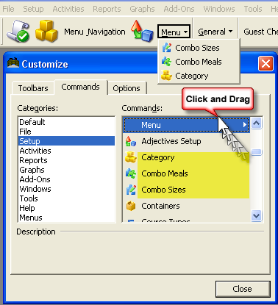
Adding a button to the toolbar is easy. The categories list in the command tab reflects the same default menu options located above the toolbar in the RM BackOffice screen. Select the category to which your button command is located. You can now select the button command you wish to move to the toolbar. You may have to scroll down to find the button command. Once you have found the button command, move it to the toolbar by left clicking and drag it to the desired position. The button command can be dropped between any current button command on the toolbar or at the ends. You will notice the separator lines between the button commands on the toolbar when dropping in the new button. RM BackOffice has the capabilities of add up to, if not more, 30 button commands to the toolbar.

In the above example, we moved “Custom Groups” into the toolbar bar.
Restaurant Manager also allows gives the end user the ability to bring menu headings into the toolbar and create sub-menus. In the next screen shot, we dragged the “Menu” command from the “Setup” category into the tool bar.
By default, menu headings are empty. You must bring additional button commands into the new heading on the toolbar. Filling menu headings is achievable using one of two methods. You can either grab a button command and drag it into the menu heading or drag it onto the toolbar first and the menu heading. In the example below, we created a new menu heading on the tool bar called “Menu” and then dragged additional button commands in the menu located in the “Customize” screen.
Adding a custom toolbar allows the user to add another row of function commands or to group commands on a single toolbar. We can add a custom tool bar by going into the “Toolbar Display” option screen and choosing “Customize”. Click on the “New” option in this box to bring up the “Add Toolbar” box to type in a name. By default, “custom 1” will display when adding your first custom toolbar. After adding the name, go to the “Command Tab” to add command functions. Follow the same steps described earlier in the section: Adding Selections to Toolbar
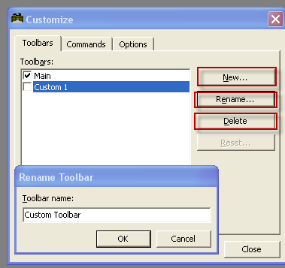
Note: do not remove the check next to the main tool bar until you have created a second tool bar.
Note custom toolbars can be renamed, disabled, or deleted in the “Customize” form. Simply taking the check out of the box next to the toolbar name will disable the toolbar but will still be available for future use.
In the screen shot below, we have set up three groups of toolbars. The amount of area used when adding toolbar rows can be significant. This may not be a desired effect when accessing different RM BackOffice functions, e.g. Menu Set-Up.
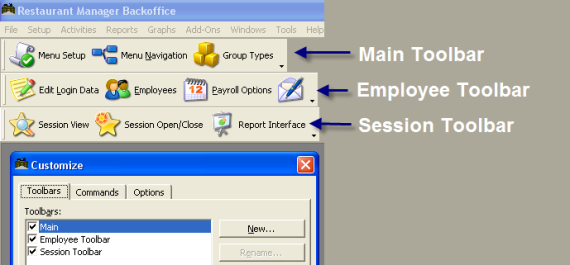
Toolbars are movable by moving the cursor over the separator line on the side of the toolbar. Once the “move curser” appears, you can left click and move it into a new position. Toolbars can be positioned on multiple rows or within a toolbar single row.
![]()
The icons listed in Toolbars are customizable. Icons are customizable during the process of adding a button or after the fact. After dragging in a button command into the toolbar, you can right click on the icon to access the icon option settings. You will have to re-open the custom toolbar setting form for the ability to right click and change button setting again.
![]()
In the button setting form, you will find the following:
Warning- changing the name on the text may adversely affect technical support
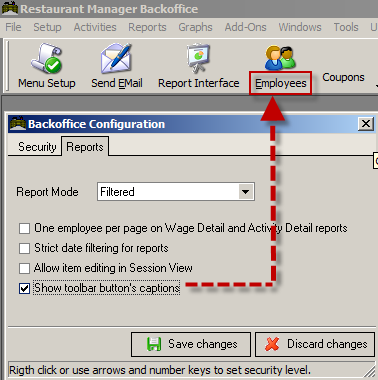
You may enable or disable the text appearing on toolbar icons the BackOffice form. Access the form by going to Setup > Backoffice > Reports Tab. Enable the option "Show toolbar button's captions" if you want to display text below the toolbar button.
Toolbars are further customizable by using some of the universal settings located within the toolbar “Customize” form under the “Options” tab. Here is a brief description of the field and their uses:
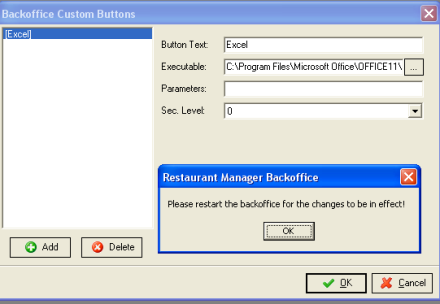
Restaurant Manager allows the end user to add an exterior program to the RM Toolbar. You can add programs like Excel, Word, and RM InfoCenter for convenient access.
Starting in RM BackOffice, open the “Tool” menu located at the top of the screen, and select “Custom Buttons”. In the “BackOffice Custom Buttons” form, click the [Add] button and type the name of the program you will add in the button text field. Click the ellipsis button to the right of the “Executable” field and enter in the programs path. You can add parameters and security level in the respective fields if needed. Click on the [OK] button when finished. You will receive a prompt instruction you to restart RM BackOffice.
You will need to follow the instruction in the section “Adding Selections to Main Toolbar” to add the new function to the toolbar. The new function will be located under the “Commands” tab in the “Default” category.
To exit the BackOffice Module:
It is important to have a backup of data in the event of computer failure due to extreme circumstances (i.e. flood, fire, virus etc). ASI recommends that you have an independent backup procedure outside of the redundancy system. Recording backup data can take many forms. A second drive can be installed on the rmserver or perhaps the data can be zipped and placed on small removable flash device. Off site data storage services are another option. It is recommended that data be backed up and stored off-site at a place you are comfortable with.
It is also recommended you back up the rmwin folder before performing an extra ordinary procedure. Examples of this may included mass menu changes, installing patches, version upgrades, etc. You will have a good working data base to return to if for some reason something unforeseen should happen.
For testing purposes, Restaurant Manager allows users to access the POS directly from the RM BackOffice Module. The Test POS is ideal for testing menu layouts, printer routing, monitor orders at the POS, etc. The Test POS is not fully functional and is limited by the following:
By default, the Test POS is loaded with a parameter of station configuration number 99. The Test POS will bypass the SYSCNFG.SCR “# Of Fixed Stations” check and will load RMPOS.exe as station 99. You can configure station 99 in Station Configuration and/or in Prep Area Devices with the necessary options needed to test transactions.
(continued in Messages Alarms and Alerts)